How to take a Screenshot Linux: Complete Guide for Ubuntu, Mint, Arch & Kali
Taking a Screenshot on Linux is simple with the built-in keyboard shortcuts and screenshot tools. It also depends on your desktop environment, but the fastest way is to use the built-in shortcuts. Capture full screen by pressing Print Screen, Alt + Print Screen for the active window, and Shift + Print Screen for a partial screen. Your Screenshot quickly saved to your Pictures folder.
Whether you’re on Ubuntu, Linux Mint, Arch, or Kali, this guide covers every built-in shortcut, desktop tool, terminal command, and third-party app you’ll need for Linux screen capture.
What are the top methods for screen capture in Linux?
We can use multiple methods to capture the Linux screen. Explore and use your preferred methods from the given:
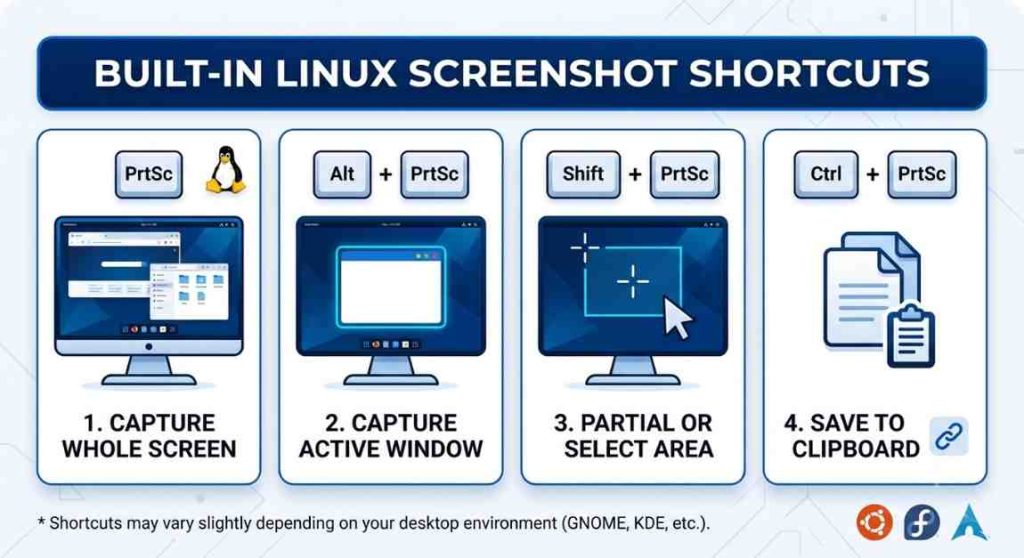
1. Built-In screenshot shortcut Linux
There are some built-in shortcut methods in Linux for taking screenshots.
Capture Whole Screen
- Press the shortcut key: Print Screen
- Choose the “Copy to Clipboard” option to save the file to the clipboard instead of a file
- Paste the captured image from the clipboard
Linux Screenshot Active Windows
- Press the Alt + Print Screen button
- Select the “Copy to Clipboard”
- Paste the image from the clipboard
Partial or Select Area
- Press the Shift + PrintScreen buttons
- Click “Copy to Clipboard” to save to the clipboard
- From the board, paste the screenshot
Copy to Clipboard
- Add Ctrl key to any of the above shortcuts, such as Ctrl + Shift + Printscreen
- It will grab a specific area
- Copy it to paste into an app
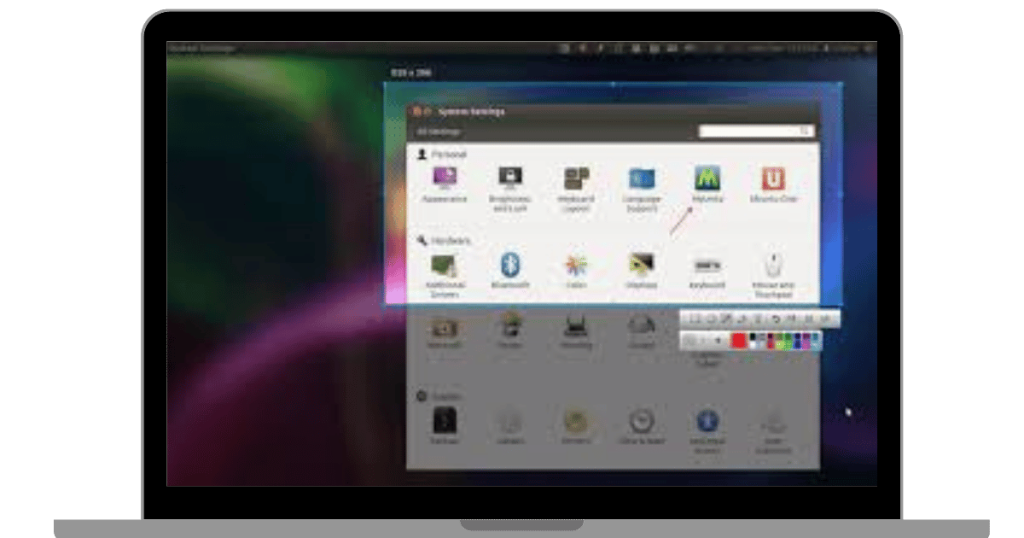
GNOME screenshot Linux / Ubuntu Linux screenshot
Linux users can use the built-in screenshot tool in GNOME or Ubuntu. It is available from the Applications menu or by pressing Print Screen. It allows you to capture full screen, a specific window, or a selected area. It also offers save or copy the image options.
KDE Plasma
Use the Spectacle tool. Launch the tool by pressing the Print Screen button. This tool offers advanced features, including timed capture, screen recording, annotation, and multiple export options.
XFCE4-Screenshoter
The Xfce4-Screenshot tool is best for quick and flexible screenshots. Users find custom delays, region selections, and configure actions, including copying, opening, or saving the image in a Linux Screenshot Editor.
2. What are the Desktop-specific utilities for screenshots in Linux?
3. How to Take a Screenshot in Linux Using the Terminal?
For users who prefer the command line or need automation, several Linux terminal screenshot commands are available.
scrot (X11)
The simplest terminal tool for X11. Add -s for area selection or -d 5 for a 5-second delay.
grim + slurp (Wayland)
grim captures the screen on Wayland; pairing it with slurp adds interactive area selection. This is the standard Linux screenshot command for Wayland users.
import (ImageMagick)
Part of ImageMagick captures the full screen on X11. Use -window to specify a window ID.
Part of ImageMagick captures the full screen on X11. Use -window to specify a window ID.
These Linux ss command tools are especially useful for scheduled screenshots or scripted workflows.
4. How to Take a Screenshot on Ubuntu Linux?
On Ubuntu (GNOME-based), the built-in screenshot experience was updated in Ubuntu 22.04. Pressing Print Screen opens a full-screen overlay where you can:
- Click Screenshot for a still image
- Click Screencast for video recording
- Switch between full screen, window, or selection mode
- Choose to copy to the clipboard or save to the Picture folder
For older Ubuntu versions, the GNOME Screenshot tool works the same way as other GNOME distributions.
5. How to Screenshot on Linux Mint?
Linux Mint screenshot uses Xfce4-Screenshooter or the GNOME Screenshot tool, depending on the desktop edition (Cinnamon, XFCE, or MATE). Press Print Screen to launch it, then select your capture mode and destination.
6. How to screenshot Arch Linux?
For Arch Linux screenshot, the tools available depend on what you’ve installed:
- X11 desktops: Use scrot (sudo pacman -S scrot) or Flameshot
- Wayland desktops: Use grim + slurp (sudo pacman -S grim slurp)
- KDE on Arch: Spectacle is included by default
No built-in GUI tool is pre-installed on a minimal Arch setup you’ll need to install one. Flameshot is the most popular choice for Arch users who want annotation tools.
7. How to Screenshot on Kali Linux?
Kali Linux screenshot works the same as other GNOME-based distributions. Press Print Screen to open the screenshot overlay, or install Flameshot for annotation features. In Kali’s terminal, scrot and import (ImageMagick) are often pre-installed.
8. What are the best Linux screenshot softwares
There are many Linux software programs you can use to take screenshots.
Flameshot

This is one of the most popular screenshot tools for capturing the Linux screen. It instantly adds arrows, text, highlights, and other annotations.
Spectacle
This is a default screenshot tool for KDE Plasma. With this tool, you can capture the full screen, area-capture, or windows.
Shutter

Snipaste is a free, unique screenshot Windows app, allowing pin images to the top of the screen for easy comparison or reference. It’s not only a free tool, but also a lightweight app.

It’s a simple, lightweight screenshot tool included with GNOME-based distributions such as Ubuntu.
How to Take a Scrolling or Full-Page Screenshot on Linux?
Linux does not include a native Linux scrolling screenshot feature. To capture full-page or long content:
- Flameshot: No native scroll capture, but excellent for visible-area annotation
- Browser DevTools: In Firefox or Chrome, use the built-in full-page screenshot option (right-click in inspector on Firefox) for full-page web captures
- Scrot with stitching: Take multiple screenshots and combine them using an image editor like GIMP
- CleanShot or Ksnip: Some third-party tools offer experimental scroll-capture support
How to edit screen capture Linux
After taking screenshots on Linux, you can easily edit them. You can add text, arrows, annotate images, and much more.
Add Text, Arrows, Rectangles, and more
You can add primitives such as rectangles, lines, and more, arrows, and text to your captured images using the built-in tools. You can also customize every shape by changing colors, line width, or fonts.
- After taking a screenshot, open it
- In the sidebars, you will see multiple editing tools
- Choose the tool you want to add to your image
Pixlize to hide data or Censor
You can hide your sensitive data, like IP or e-mail addresses, using the shutter tool. Shutters offers two methods to hide data.
Auto-increment Shape
When you are creating a step-by-step guide, you often need to number screenshots. The Shutter tool adds numbers automatically to your images. It manually inserts numbers in a quick, easy auto-increment shape.
How to crop a screenshot on Linux?
Every tool offers a cropping editing facility. Simply open the image and click on the crop icon. Select the region you want to capture. Click done and save.
How to share SS Linux?
You can easily share a Linux Screenshot just after capturing the screen. Click the share button and share it using social platforms such as WhatsApp, e-mail, or other messaging apps.
Linux vs Mac vs Windows screenshots
If you work across platforms, here’s how Linux compares with Windows, Mac, and other operating systems:
| Feature | Linux | Mac | Windows |
|---|---|---|---|
| Full-screen shortcut | PrtSc | ⌘ + Shift + 3 | Win + PrtScn |
| Area selection | Shift + PrtSc | ⌘ + Shift + 4 | Win + Shift + S |
| Window capture | Alt + PrtSc | ⌘ + Shift + 4 + Space | Alt + PrtScn |
| Built-in annotation | Flameshot (third-party) | Markup in Preview | Snipping Tool |
| Scrolling screenshot | No built-in | Third-party | ShareX |
| CLI tools | scrot, grim, import | screencapture | None |
| Save location | ~/Pictures/Screenshots/ | Desktop | Pictures\Screenshots |
Tips to capture a high-quality screenshot
Here are beneficial tips: you can capture high-quality screenshots and use them.
- Add a time before taking a screenshot to capture tooltips, dropdowns, or menus
- Add a clean border or subtle shadow to give it a professional look in blog posts or guides
- Save the screenshot in different formats, such as PNG, JPG, or PDF.
- If you want to take screenshots at regular intervals, you can schedule them automatically.
- Create custom shortcuts for faster screen capturing
FAQs about screenshot for Linux
How to take the Snipping Tool on Linux?
Snipping or taking a screenshot on Linux is available in the operating system without installing a separate tool. The fastest way to capture the Linux screen is by pressing Ctrl + Shift + PrntScn or Shift + PrntScn to capture a selected area and automatically save the Linux Snip to your picture folder.
How to take a Linux screenshot without the Print Screen?
You can take a screenshot without using the Linux Print Screen key by using the pre-installed GUI tools, running terminal commands, or assigning a new shortcut key.
What is the best screenshot tool for Linux?
Flameshot is the best choice overall as it’s a free tool that works on most desktops. It offers full markup tools: arrows, shapes, blur, and text. You can also utilize other screenshot tools for Linux, such as Spectactle, Shutter, Screensnap Pro, and more.
Can I annotate Screenshots on Linux?
Yes, you can annotate Linus Captured images using third-party tools like Flameshot, which offers advanced annotation features. Spectacle has basic annotation, while Shutter offers full editor access.
Which Linux screen capture tool works on Wayland?
You can use GNOME’s built-in tool or KDE Spectacle to take a screenshot on Wayland. Grim + Slurp also works on it. Flameshot partially supports it, while other tools never work with it.
How do I use the snipping tool on Linux?
Linux doesn’t have a tool named “Snipping Tool” like Windows, but the equivalent is built in. Press Shift + Print Screen to select and capture a specific area, or press Print Screen to open the full screenshot overlay on GNOME. For more control, install Flameshot — it’s the closest equivalent to a full Linux snipping tool.